Lower Body Harness Variety Pack Options
This is intended to accompany Shay's Lower Body Harness Variety Pack class and is not stand-alone material.
Class Logistics
Depending on the size and experience level of the class, we will likely get to do two of these. Which ones we cover will be decided based on popular demand (we’ll take a vote at the beginning of the hands-on portion of the class). Your vote counts!
Prereq reminder: Anyone is welcome to observe. The hands-on portions of the class are fast-paced and require a strong knowledge of floorwork basics such as tension, placement, negotiation, and consent, as well as techniques including lark's head, half hitch, and combining rope. Also required are body and health awareness to participate safely at a level appropriate for your body. If you lose us, I hope you can switch gears, observe, and build skills for next time.
General harness notes
There are dozens of popular lower body harnesses and infinite variations within these! No one harness is going to be the magical harness that works the best for every person all of the time. Many factors influence which harness will work best for a particular person in a specific suspension. These can include individual differences in nerve vulnerability, placement preferences, priorities, intention, experience/habituation, etc.
Harness selection tends to involve trade-offs – for example, hip harnesses with more structure and support tend to limit leg movement. My primary focuses are mobility and self-suspension, so the harnesses I teach are better for self-tying and moving around in the air.
These ties are based on commonly taught patterns and techniques (for example, weaving is one of the oldest surviving crafts in the world, tracing back to Neolithic times). Where I can, I've credited where I originally learned these patterns. The way I tie them has evolved over the years, often with modifications my partner Angel comes up with. Ultimately, humans have been using rope for a long time and there's nothing new under the sun…
Difficulties are rated according to my subjective judgments, where 1 is the easiest (think a reverse tension and half hitch single column) and 5 is the most difficult.
I timed myself while self-tying the harnesses for the photos that follow – this number (rounded up to the nearest 30 seconds) is provided to give a feel for how long it takes to tie these relative to each other.
Class harness options
Butt Rainbow Thigh Tie of Doom


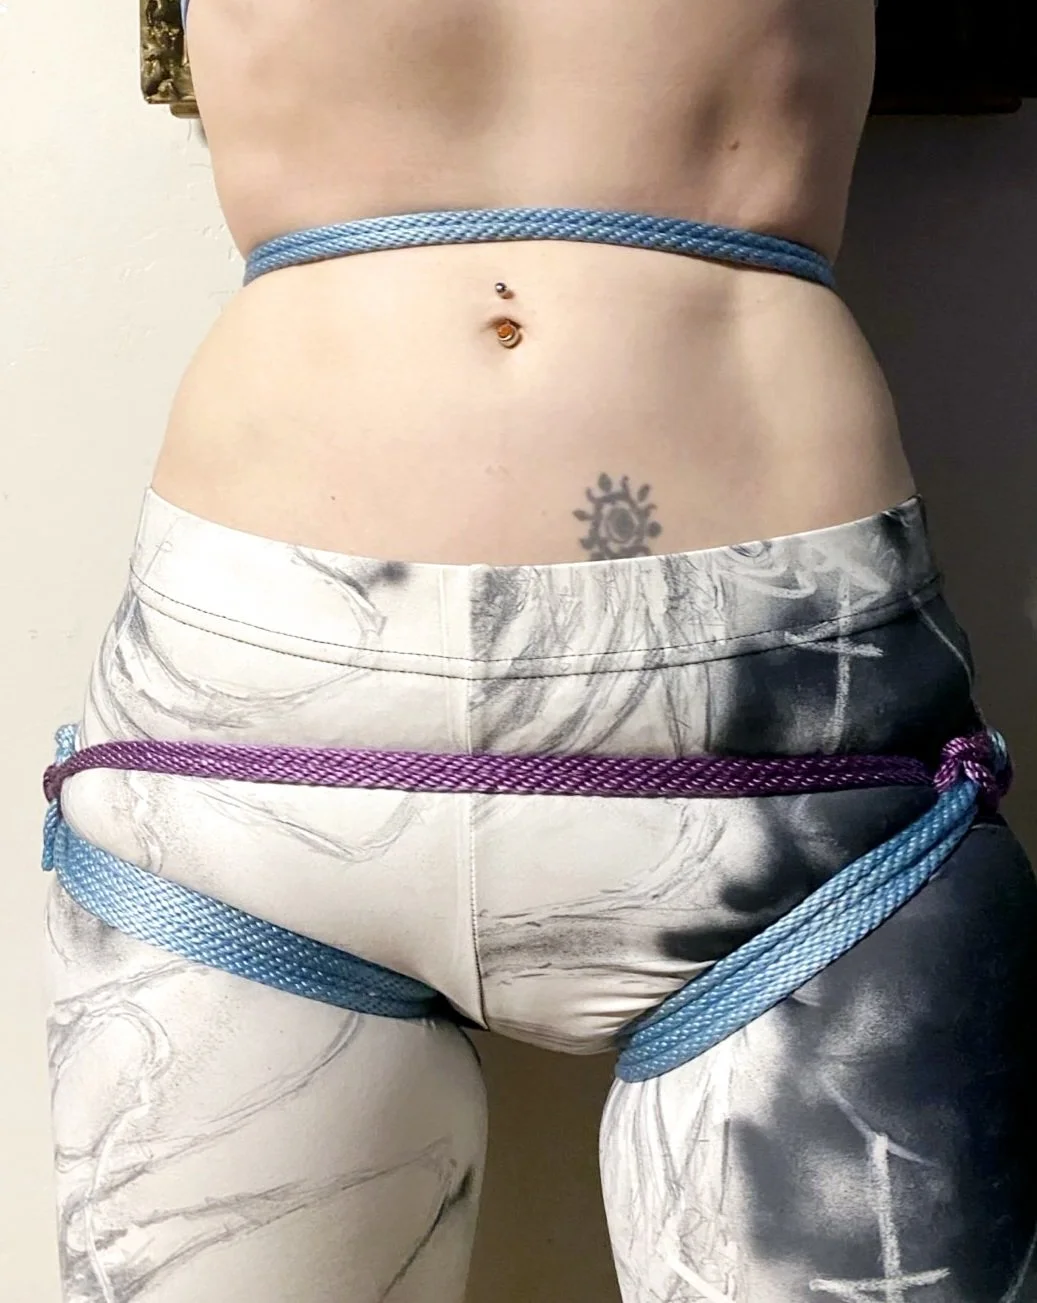
Features: Bands around each thigh, anchored with a waist wrap (which does not significantly load). Knots are located on the lateral thighs. Allows excellent mobility.
Difficulty (partnered tying): 3
Difficulty (self-tie): 3.5
Time to tie: 1.5 minutes
Best position(s): Inversion, face up, face down
Potential pitfalls: Nerve vulnerability, especially LFCN. Intense on the front of the thighs (takes habituation). Tends not to work as well for folks with very firm/cylindrical thighs. Note that three things hold the thigh bands in place: 1) tension (this harness needs to be tied exceptionally tightly), 2) thigh squish, and 3) the position of the thighs (if the legs are held straight up in an inversion, the harness will slip; keeping the legs bent and angled helps hold the bands in place). If you have issues with the lateral knots sliding back, causing the “butt rainbow” to lose tension, consider adding a “seatbelt” across the front of the harness, as shown with purple rope in the last photo.
Background: My partner Angel and I created this tie. I have seen other similar ties, generally with a somewhat different structure, sometimes based off building from the waist wrap of a chest harness.
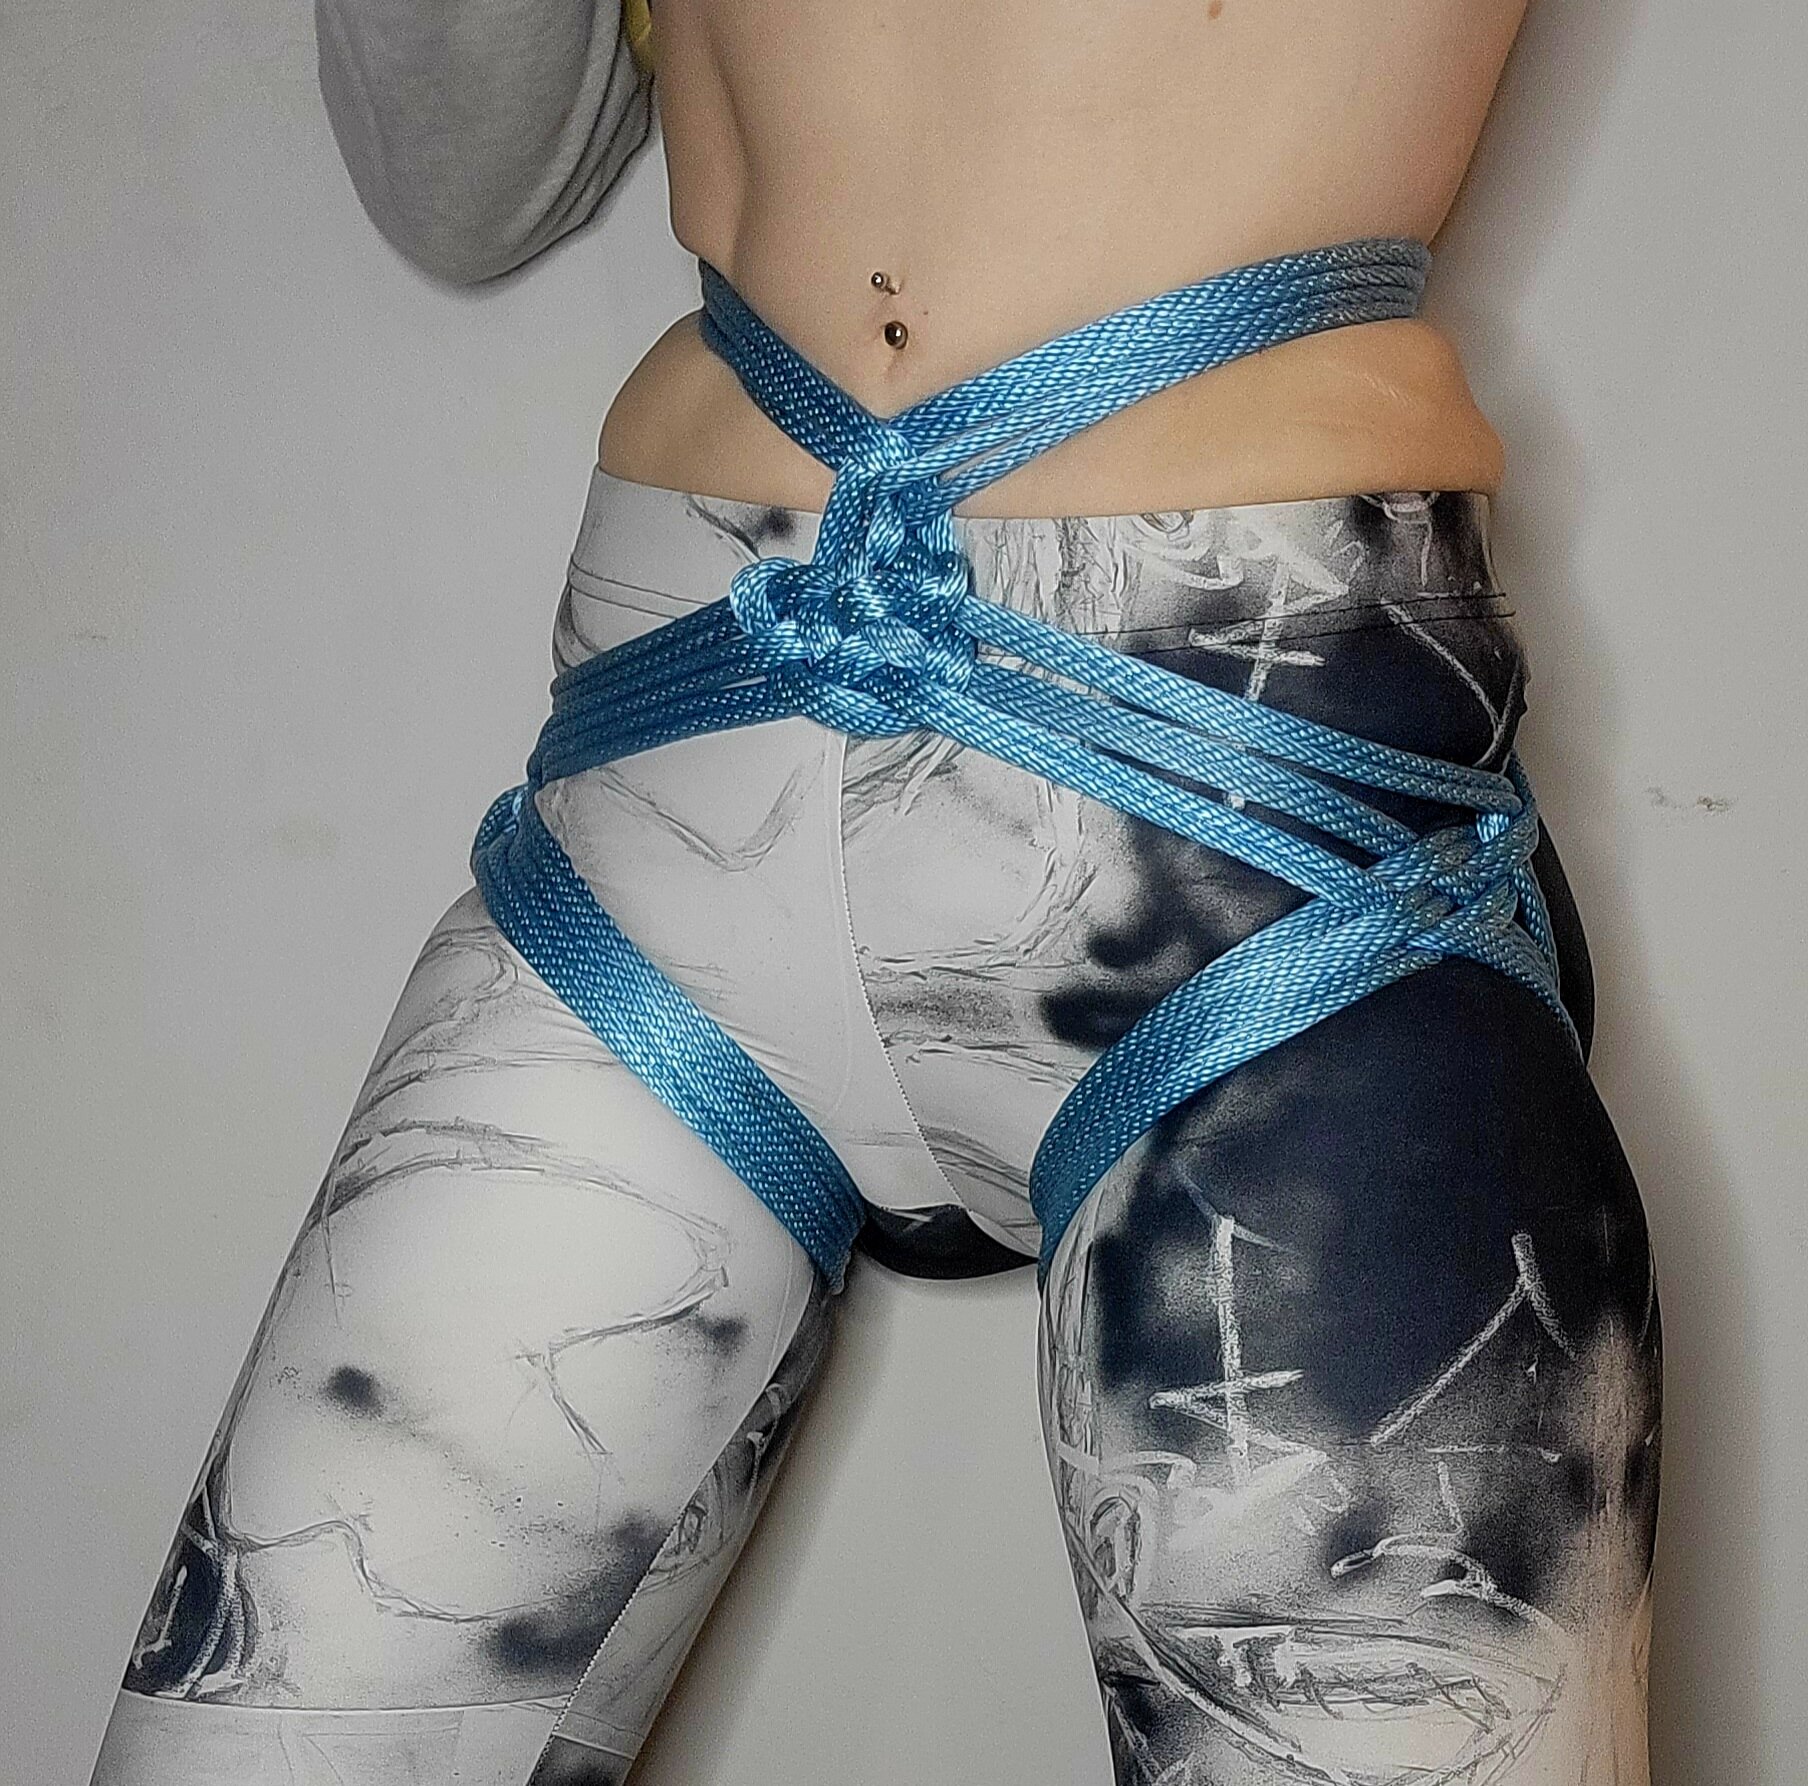
Swiss Seat (with added butt wrap)


Features: Stem across the front, hip band secured directly to thigh bands. Here I’ve done two wraps per band, but you could do three (or more). I like very low placement for my hip wrap, but this could be placed higher if desired (although if you prefer much higher placement, other harness structures are better suited). This is my preferred harness to teach as folks’ first hip harness – it’s fairly straightforward to tie and in my experience is the harness that works the best for the most people the most of the time.
Difficulty (partnered tying): 2
Difficulty (self-tying): 2
Time to tie: 3 minutes
Best position(s): Face up (including positions like bridge). Consider loading from the thigh bands for a “true” inversion.
Potential pitfalls: Not as optimal for face-down or inversion, due to knots at the front of the hips. Other hip harness designs are more optimal if you prefer both hip and waist loading.
Background: I first learned a version of this harness from Topologist.
Woven hip harness


Features: Three-wrap bands around the thighs and hips. While there is a waist wrap, it is an anchor and does not significantly load when hangers are attached as shown.
Difficulty (partnered tying): 3
Difficulty (self-tying): 3.5
Time to tie: 4 minutes
Best position(s): 2-point (from the side weaves), face up, face down, inversion
Potential pitfalls: Tension can be tricky. Can slip down for folks with an “apple” shape – consider attaching/anchoring it to a chest harness to avoid this. Attaching to the center, while very tempting, is generally full of sadness and fail (unless you really like waist loading).
Background: I first learned a version of this harness at a self-suspension skill share many years ago.
Butt Star reinforcement (builds from the Swiss Seat or Woven Hip Harness)


Features: Adds support and comfort to different hip harness designs. Anchors the hip line to the thigh lines to prevent the hip line from riding up or thighs from riding down.
Difficulty (partnered tying): 3.5
Difficulty (self-tie): 4
Time to tie (only the time of adding this to an existing harness): 2 minutes
Best position(s): Face up, inversion (not much value-added for face down)
Pitfalls: Time-consuming, a bit complicated, can be difficult to get the correct tension, difficult to self-tie
Background: My partner Angel created this.
Leg ladder harness with (optional) thigh anchor


(This leg ladder builds on a gunslinger, so showing this tie also shows the gunslinger.)
Features: Hip and thigh bands anchored to a stem that runs laterally along the leg, with bands going down the thigh. If you like waist rope, you can skip the thigh anchor and just start with a column tie around the hip or waist – this tends to ride up to the waist, hence the anchor to keep it down.
Difficulty (partnered tying): 3
Difficulty (self-tie): 3
Time to tie (full harness): 4 minutes
Best position(s): Side, inversion/torsion
Pitfalls: Consistent tension can be difficult to achieve. Depending on the PIR’s leg structure, rope used, etc., it can be very difficult to keep this from sliding down (nylon rope over slick leggings = maximum difficulty).
Background: This is based on weaving and ladder ties, fundamental rope techniques that are incredibly widely taught.
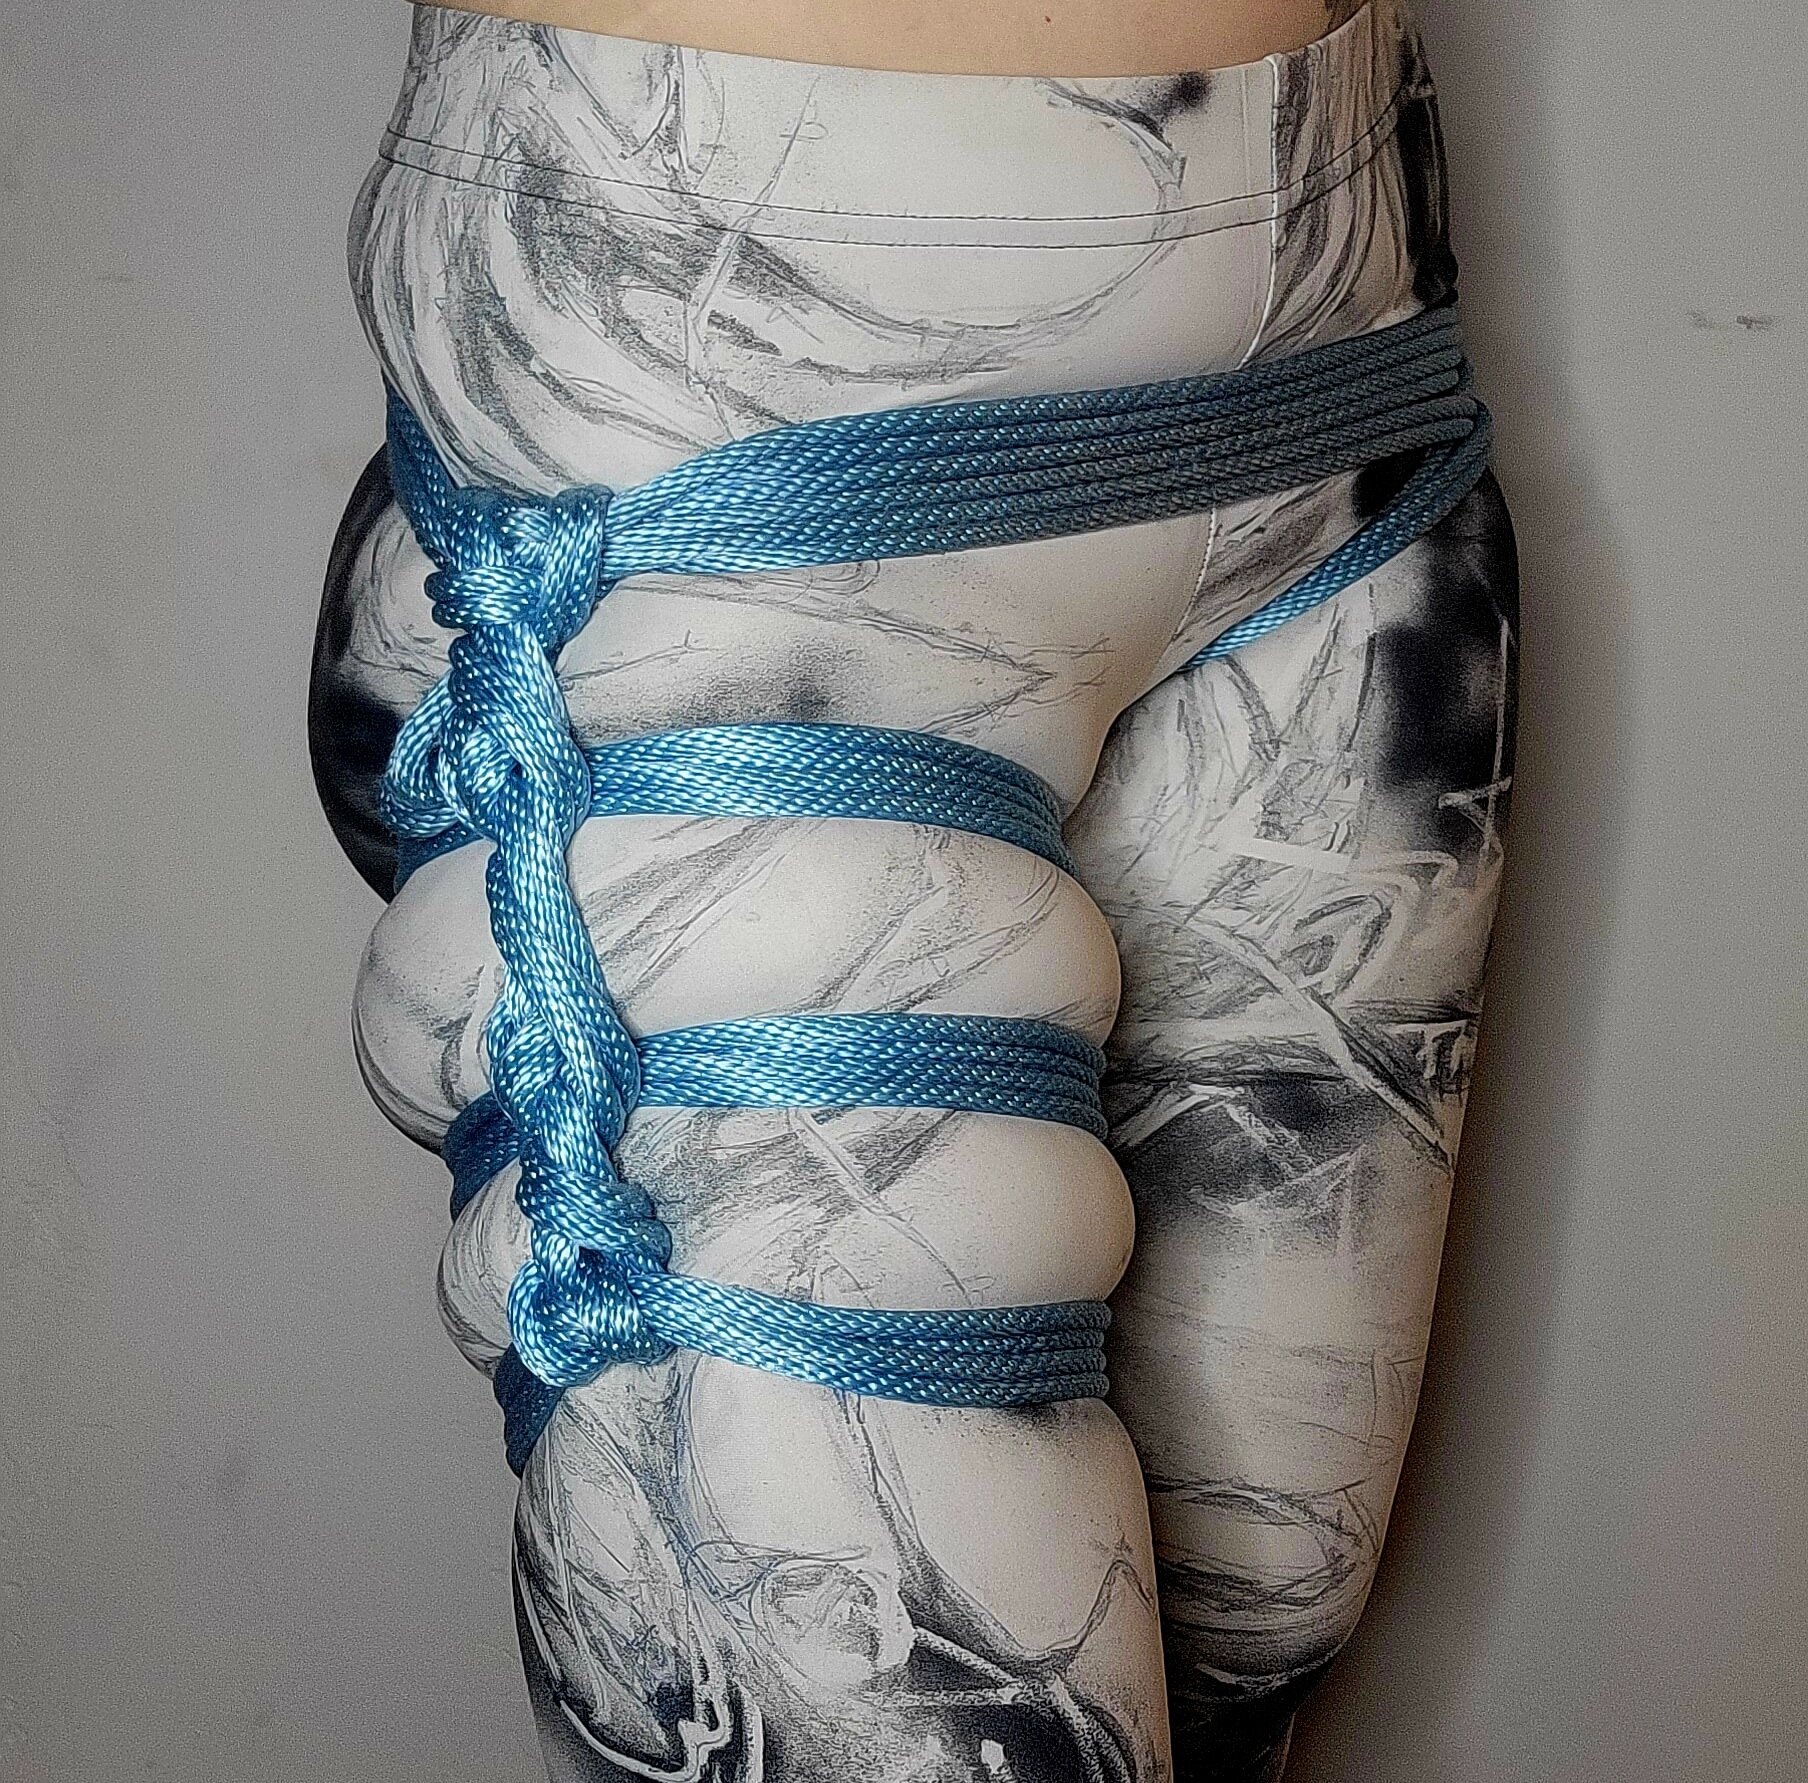
Bent leg tie/Futomomo


Features: Restrains the leg in a bent position. Pupper is an optional feature and not included in class.
Difficulty (partnered tying): 3
Difficulty (self-tie): 2.5
Time to tie: 3 minutes
Best position(s): Side, inversion, torsions
Pitfalls: Can be intense/painful. Nerve vulnerability and potential for knee damage. Some folks are into it and some really, really aren’t.
Background: I was first shown a futomomo from the “chaos” family many years ago at a skillshare. This one shares characteristics with that, and we have modified it over the years.
Bonus harness options (not part of class voting)
Mermaid tie


Features: Broad support across the thighs, binding the legs together.
Difficulty (partnered tying): 3
Difficulty (self-tie): 3
Time to tie: 5 minutes
Best position(s): Face up, side
Potential pitfalls: Limits mobility, which can increase safety concerns (especially for self-tiers). Difficult to maintain consistent tension. It can be difficult to get between the legs for the frapping turns.
Background: This is based on ladder ties, a fundamental rope technique that is incredibly widely taught.
Drum harness reinforcement (builds from any of the hip harnesses)

Features: Adds support and comfort to different hip harness designs. Anchors the hip line to the thigh lines to prevent the hip line from riding up or thigh lines from riding down.
Difficulty (partnered tying): 2
Difficulty (self-tie): 3.5
Time to tie (only the time of adding this to an existing harness): 4 minutes
Best position(s): Face up
Pitfalls: Time-consuming, busy aesthetics, can be challenging to get the correct tension.
Background: This is based on weaving, a fundamental rope technique that is incredibly widely taught.
Gunslinger


Features: A single hip and thigh band connected at the lateral hip.
Difficulty (partnered tying): 2.5
Difficulty (self-tie): 2.5
Time to tie: 1.5 minutes
Best position(s): Side
Potential pitfalls: Due to the minimal structure, it tends to distort and move out of place. Not good for single-point suspension.
Background: This is based on weaving, a fundamental rope technique that is incredibly widely taught.
Crossed-leg tie
Features: Restrains both legs in a bent position.
Difficulty (partnered tying): 2.5
Difficulty (self-tie): 2.5
Time to tie: 3 minutes
Best position(s): Partial, inversion
Pitfalls: Not intended for eels/inescapable bondage – if the PIR wiggles their feet out, the entire tie becomes loose and insecure. Can be intense/painful. Nerve vulnerability and potential for knee damage.